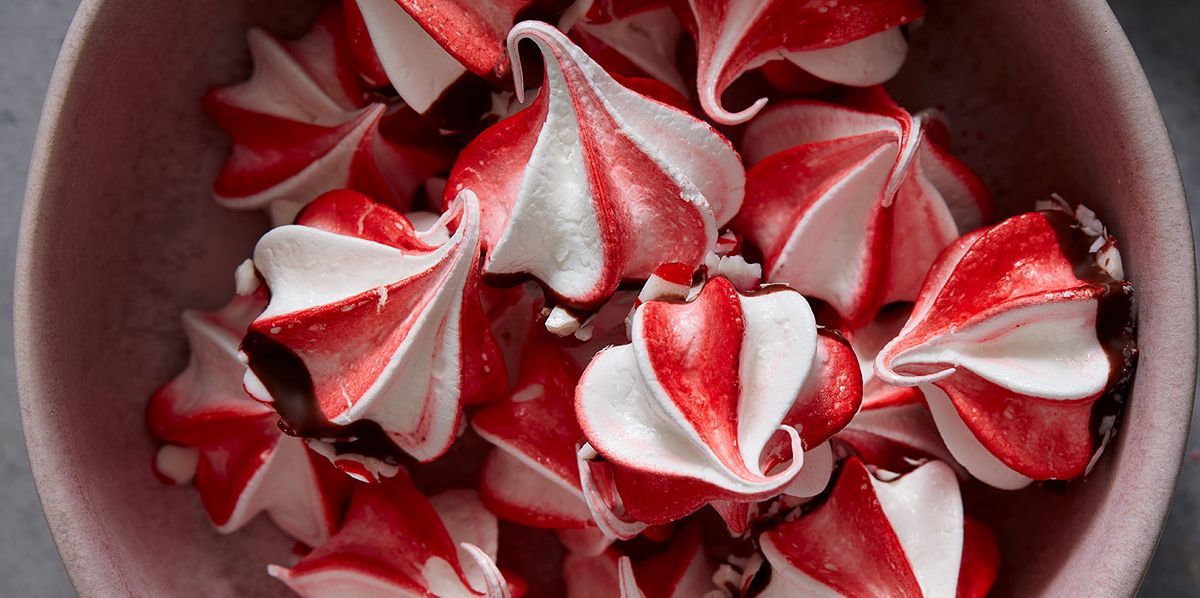
Christmas cookies can take on a variety of shapes and colors, but if you’re looking to really add some color and fun to your holiday dessert spread, then these peppermint meringues are the answer. Their peppermint stripes scream “holiday!” in the best way, and they taste like minty little clouds. Plus, they last for a good few weeks after baking, so you can snack on them all season long. New to meringue? Keep reading for all of our top tips on how to make these adorable holiday treats:
How to make peppermint meringues:
Although they look impressive, the recipe is very simple. You’ll make a basic meringue and flavor it with a touch of peppermint extract. To achieve the candy striping, you paint the inside of a piping bag with stripes of red gel food coloring before filling it with the fluffy meringue. A food-specific paint brush helps get the right-size thin stripes, but if you don’t have one, use the thin edge of a pastry brush or the tip of a table knife.
You’ll pipe the mixture into adorable little cookies that bake at a low temperature for almost 2 hours. This allows the cookies to get super crisp. Note that the resting period inside the oven is crucial so the meringues don’t crack. Finally, a quick dip in some melted chocolate and a dusting of crushed peppermints just takes these already adorable cookies over the top. If you’d prefer a simple white-and-red combination, dip the meringues in white chocolate, instead.
Serving peppermint meringues:
We love these meringues served at a holiday party, or gifted to friends and family as the most adorable food gift. Nestle them alongside our Christmas tree cookies, gingerbread people, eggnog truffles, and our panettone cookies for a crowd-pleasing arrangement.
Storage:
Store any leftover meringues in an airtight container at room temperature where they’ll keep for around 2 weeks.
Made this recipe? Let us know how it went in the comments below!
- Yields:
-
35 – 40
- Prep Time:
-
15 mins
- Total Time:
- 4 hrs 30 mins
Directions
-
- Step 1
Preheat oven to 200°. Line two sheet pans with parchment paper.
- Step 2In bowl of a stand mixer fitted with a whisk attachment, combine egg whites, cream of tartar, and salt. Beat on medium speed until whites are foamy and soft peaks form, about 1 minute. With mixer running, slowly add sugar 1 tablespoon at a time, then increase speed to high and beat until meringue is thick, marshmallow-like, and holds firm peaks, 4 to 6 minutes. Beat in peppermint extract.
- Step 3Fit a large disposable piping bag with a large tip and fold top back to create a cuff. Using a small paint brush, paint a few thin vertical stripes of red food coloring inside bag. Rest bag in an empty drinking glass to prop it up, then use a rubber spatula to scrape meringue into piping bag. Fold back top of bag and twist top to seal.
- Step 4Pipe 2” cookies on prepared sheet pans, leaving 1” between cookies. Bake until cookies are very crisp and hard to the touch, 1½ to 2 hours. Turn off oven and let cookies sit in oven until completely cool, about 2 hours.
- Step 5Place peppermints in bowl of a mini food processor. Pulse until candy is broken up into fine pieces. (Alternatively, place them in a small ziptop bag and crush with a meat mallet or rolling pin.) Transfer to a small bowl.
- Step 6In a small microwave-safe bowl, microwave chocolate chips in 30-second intervals, stirring between each, until melted and smooth.
- Step 7Working with one cookie at a time, dip bottom of meringue in chocolate and let excess drip off. Sprinkle some crushed peppermints over chocolate and return immediately back to baking sheet. Repeat with remaining cookies, then refrigerate until chocolate is set, 15 to 20 minutes. Store in an airtight container.
- Step 1












Leave a Reply